sudo raspi-config
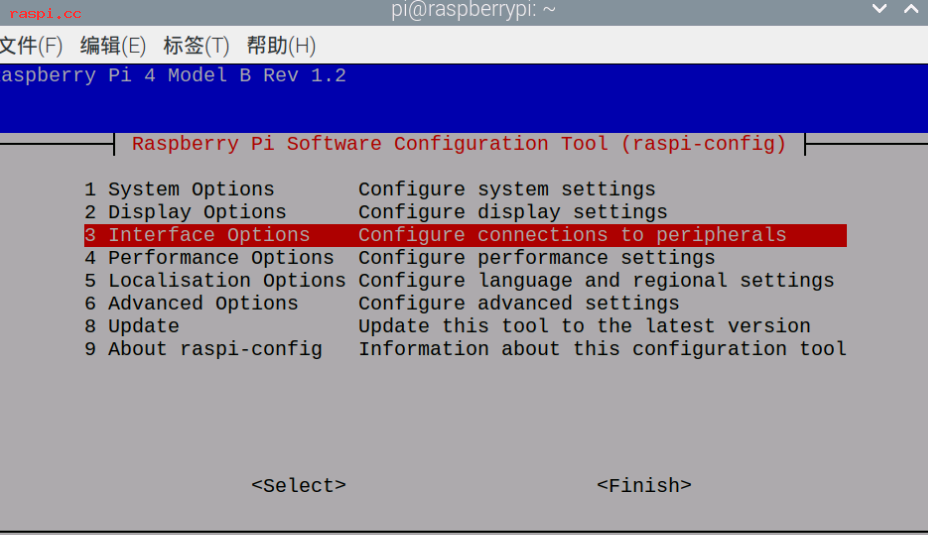
选择第三项:Interface Options 按回车进入
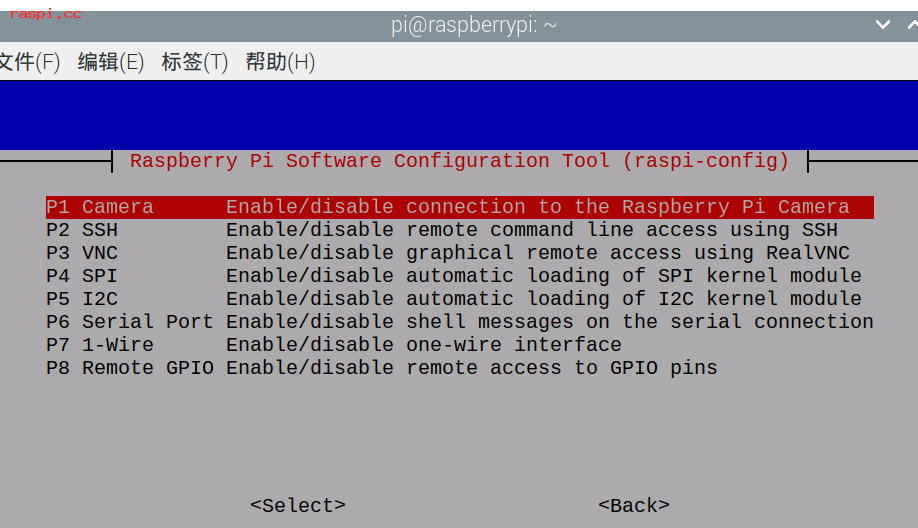
在选择:Camera 按回车进入
在选择:"是" 按回车就能启用摄像头功能

开启摄像头后建议重启一下树莓派
四:用摄像头拍摄演示
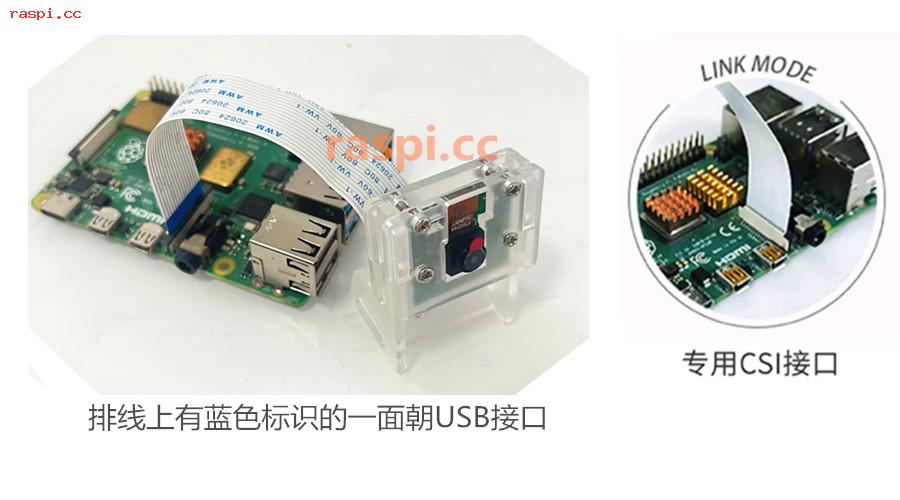
先检测下摄像头是否被树莓派识别,可输入下面命令检测,如果树莓派正常识别到摄像头,显示状态应该是(supported=1 detected=1),当然下图这种情况则是摄像头没有被识别,这时候请检测摄像头排线是否接错了方向。
vcgencmd get_camera

如果一切正常,我们可以尝试输入下面命令进行操作:
1.输入命令进行拍照
raspistill -o raspi.jpg -t 30 (该命令中:-o是设置文件名 -t是设置延时30ms)我们还可以用 -e png 指定生成jpg、png、gif、bmp格式的图片,后三种无损,生成速度会慢些(如下)
raspistill -e png -o raspi2.png -t 30
2.查看照片:
如果要查看拍到的照片文件可以用命令查看,也可以在桌面的文件管理里面查看为:raspi.jpg格式的图片
查看照片命令:xdg-open raspi.jpg
raspivid -o testvideo.h264 -t 3000该命令生成的是未压缩的H.264视频流,可以转换为MP4更通用的视频格式。可以使用gpac 包的 MP4Box 来进行转换。
安装gpac
sudo apt-get install -y gpac
进行转换:30帧,原视频名testvideo.h264 新视频名 testvideo.mp4
MP4Box -fps 30 -add testvideo.h264 testvideo.mp4
sudo apt-get install eog可以安装vlc来播放视频(OMXPlayer 已在最新版本弃用,VLC现在是推荐的替代方案。
sudo apt install -y vlc
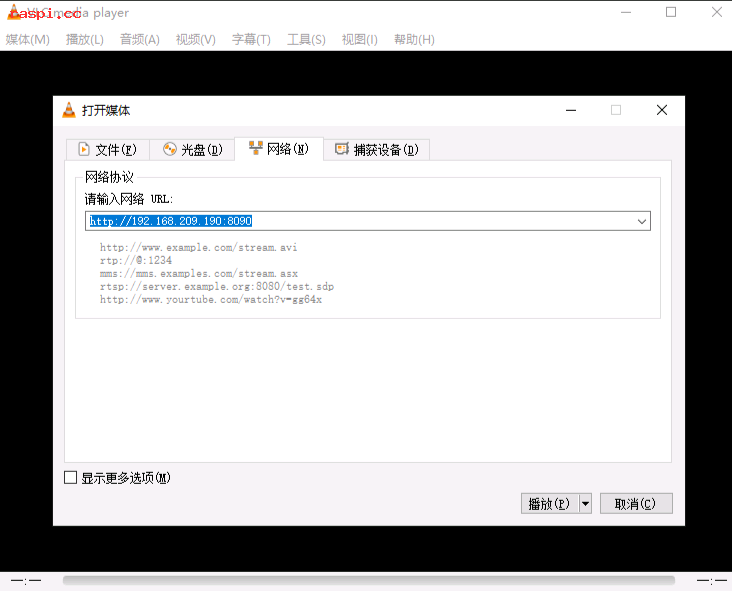
sudo raspivid -o - -t 0 -w 640 -h 360 -fps 25|cvlc -vvv stream:///dev/stdin --sout '#standard{access=http,mux=ts,dst=:8090}' :demux=h264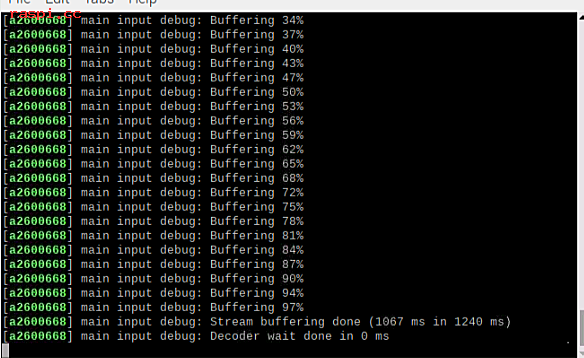
sudo apt-get install motion
sudo nano /etc/motion/motion.conf
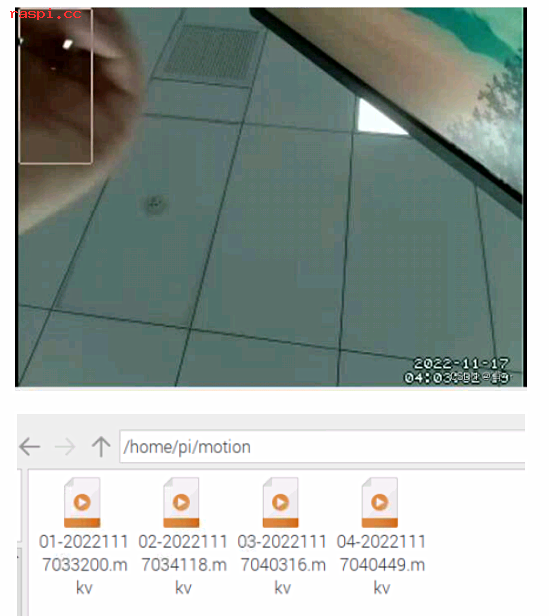
更改几个参数
target_dir /home/pi/motion  # 设置拍摄图片视频的存储目录
locate_motion_mode on  # 探测到图像中有运动时,把运动区域用矩形框起来
output_pictures best # 将off改为best,还可以选first和center
stream_localhost off  # on 只能由本地主机能访问网络摄像头
stream_maxrate 30  # 以每秒帧数限制网络摄像头的帧速率。
stream_montion on # on时,则在未检测到运动时,会将网络摄像头流的速度减慢到每秒 1 张图片。检测到运动时,流将按照stream_maxrate值发送。off 时,网络摄像头流始终按照 stream_maxrate的规定发送
framerate 15 # 帧率
stream_port 8081 # 端口号
sudo motion
更多参考资料:
树莓派官方摄像头文档:https://www.raspberrypi.com/documentation/accessories/camera.html
树莓派官方摄像头文档:https://www.raspberrypi.com/documentation/computers/os.html
树莓派摄像头打造实时监控教程:http://www.raspi.cc/read-50-1.html?cache=refresh
 广告
广告


Copyright ©2024 www.raspi.cc All Rights Reserved. 树莓派极客本站版权所有 粤公网安备10068088号